Starting the Director
- If this is the first time you have started the Director, please refer to Start Director
- Log in using an Artist or Live license
- Check to make sure you are in PRODUCTION view (you can see from the drop-down in the top left-hand corner)
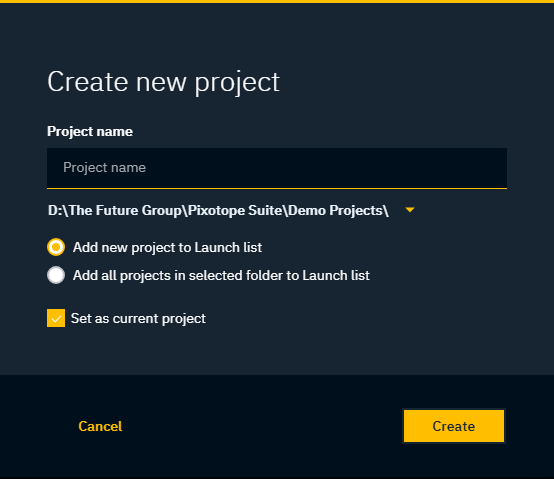
Creating a project
- Go to the "Launch" page
- Click "Create new project"
- Name your project
- Only alphanumeric characters are allowed, and it is recommended that the name be no longer than 20 characters (Unreal engine restriction)
- Set your project location
- Add it to the project list
- Set it as the current project
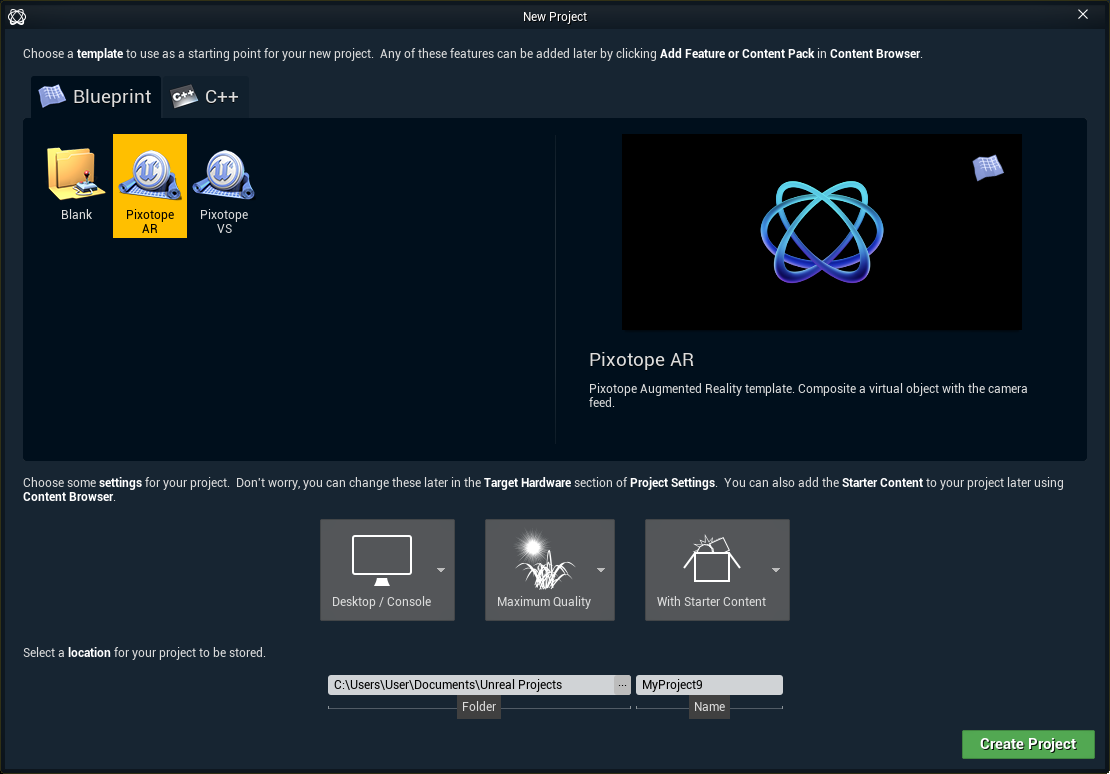
Alternative method of creating a project
- Choose "New Project"
- Choose the "Blueprint" tab
- Choose a "Blank" project
- Choose "Desktop/Console"
- Choose "Maximum Quality"
- Decide whether or not you want to include the starter content
- Make sure the folder path is part of your Pixotope projects folder paths
- Choose an appropriate name
- Click "Create Project"

Example projects
Check out the following examples:
- LVL_PixotopeARSample level in the Pixotope Calibration project included in the installer
- LVL_PixotopeVSSample level in the Pixotope Calibration project included in the installer
- Advanced example projects, which can be downloaded from → Pixotope Cloud
Creating your first level
Continue to Prepare levels in the Pixotope Editor.