1.4 | Example content
Introduction
There are currently five different projects available to download:
PixotopeMascot
PixotopeStudio
PixotopeExterior
PixotopeWeatherDataIntegration
PixotopeDMX
The projects are intended to give a good introduction to various use cases, and, for the curious, a view into how more advanced setups are created.
All the projects come with a Custom Control Panel specifically for the project. These are examples of how to trigger actions in your projects through a simple yet powerful control system.
The contents of these zip files are the full Pixotope projects, containing everything you need to run them and their control panels. They also contain all the assets that have been created by our team.
Please refrain from using any of the content in these examples for purposes other than demo and training. You are encouraged to experiment and dissect as much as you like. (Please send us your tests!)
No commercial use is allowed with these assets!
Get started
Log in to your user account page on login.pixotope.com
Under the Downloads menu, choose examples for the appropriate Pixotope version (project files are not backward-compatible)
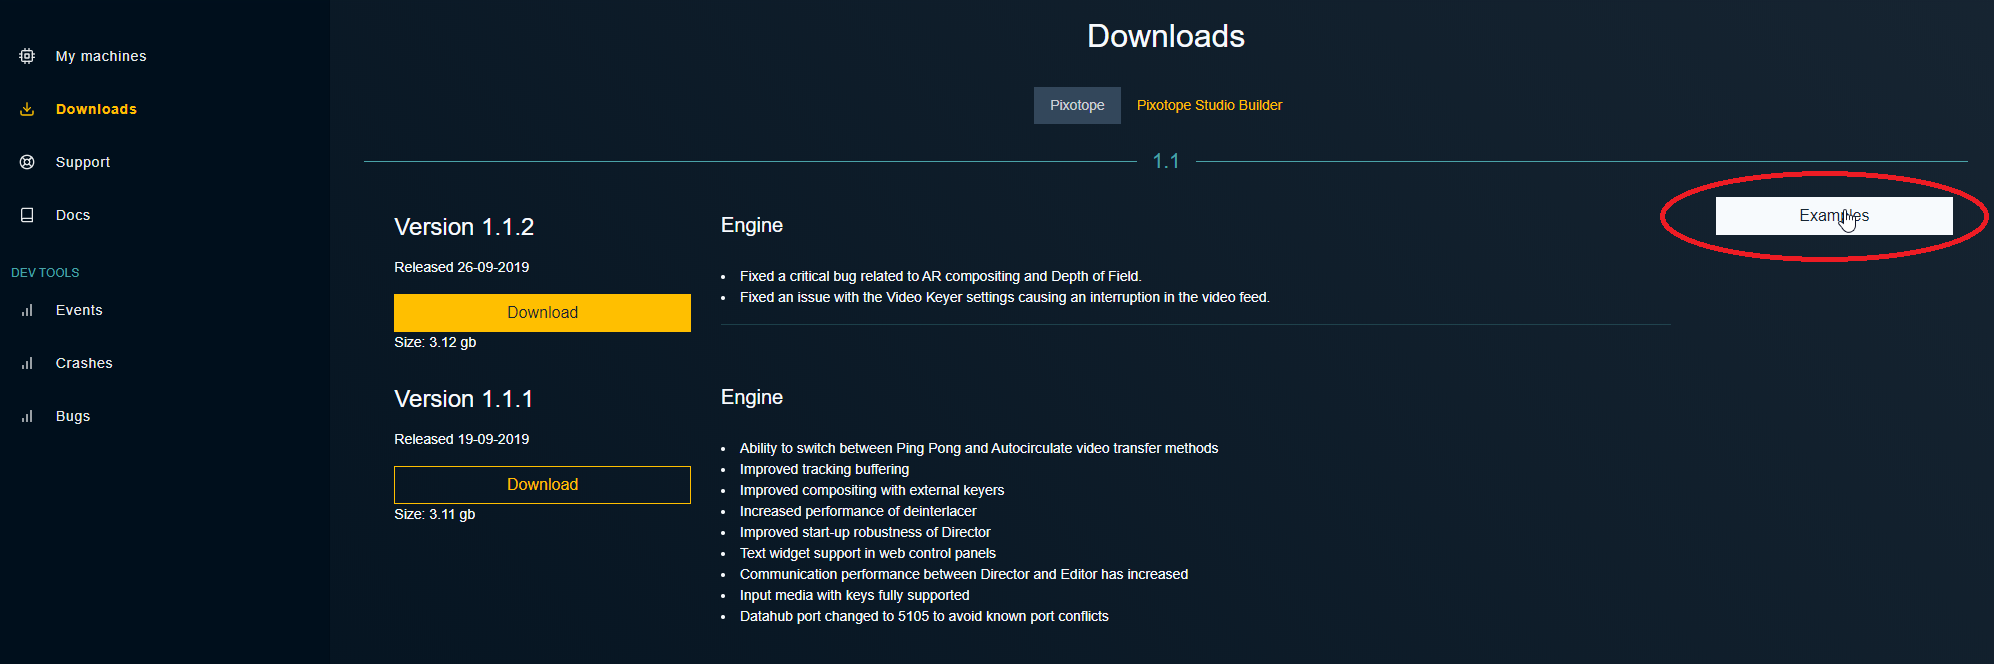
The projects can be downloaded individually (as zip files)
Extract the archives in a project root folder of your choice, e.g.
<my drive>\<my project>\PixotopeMascotorC:\projects\PixotopeMascotAdd the project individually or together (by either adding the individual folders or the project root) to the Director in SETUP → Settings → General
Click the “Add projects folder” button to the right
After the projects have been added, they will show up in the “Launch” menu, with their individual levels and control panels
Click “Set as current project”
Hover over the level you want to launch and click “Launch in Editor”
Note: The projects will take some time to compile materials on the first launch.
The control panels
With the included control panels you are able to control the actions set up in the level. We made them colorful and clear. Feel free to edit the panels and move things around to your liking, or even use them from your phone, tablet, laptop or similar by copying the URL from the hamburger menu, top left in the control panel page (you need to be on the same network).
Open the control panel directly from the launch panel in Director by clicking the “Open panel” button
Some actions in the control panel only work in Preview Live or LIVE mode.
Learn more about the different ways to launch a level: Edit, Preview Live and LIVE mode.
Description of projects
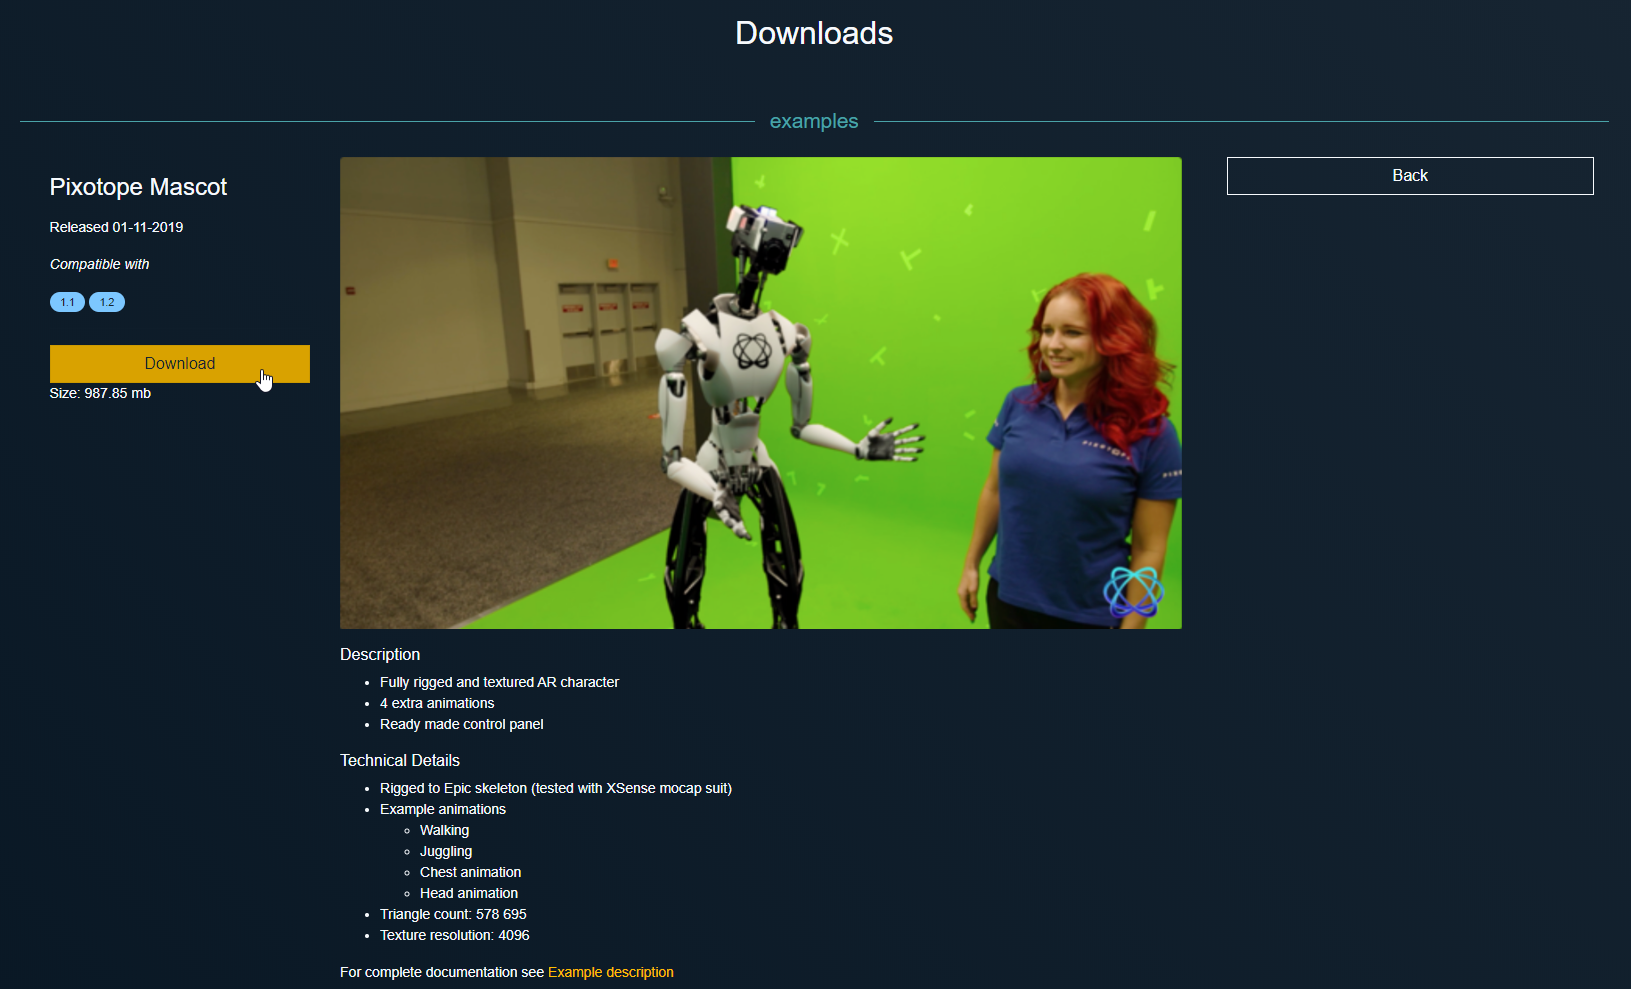
PixotopeMascot
Our beloved mascot character Dot. This project gives a good overview of how an animated AR character can be set up, as well as how it ticks. (Please let us know if you wish to drive him with live motion capture as well.)
Level contents
Fully rigged and textured AR character
4 extra animations
Ready-made control panel
Technical details
Rigged to Epic skeleton (tested with XSense mocap suit)
Example animations:
Walking
Juggling
Chest animation
Head animation
Triangle count: 578,695
Texture resolution: 4,096

PixotopeMascot controls
“Enter” will bring Dot center stage by walking him in. Play around a bit.
PixotopeStudio
A virtual studio set environment. This project shows how to run a virtual studio, with a control panel to show color changes, virtual monitors with live inputs and virtual camera moves. This studio utilizes baked illumination for more rapid rendering as an example.
Level contents
Fully functional Virtual Interior Studio
Virtual camera moves and animated elevator for talent, with the option to raise and lower monitors
Ready-made control panel
Technical details
The camera moves are set by a rail and are adjustable in the Editor
The tracked camera is attached to the pillar socket in BP_PillarElevationAnim and will raise with the elevator
Monitors waiting to receive Media Input
Triangle count: 1,530,998
Texture resolution: 4,096

PixotopeStudio controls
A few triggers for various actions.
PixotopeExterior
An advanced exterior scene based on photogrammetry techniques and advanced material setups. This also comes with controls that will change weather and seasons.
This exterior uses fully dynamic lighting.
Level contents
Functioning exterior virtual environment with weather effects
3 weather states
Ready-made control panel
Technical details
Rain and snow effect using cascade particle systems
Weather states
Sunny with clouds
Rain with fog
Snow with frost
Triangle count: 220,046,958
Texture resolution: 4,096 and 8,192

PixotopeExterior controls
A few ways to change the weather and mood. Try making your own!

PixotopeWeatherDataIntegration
A simple virtual environment which showcases live data integration, using weather as an example. It uses weather information from the Norwegian Meteorological Institute to dynamically adjust the scene lighting and weather symbols.
Level contents
Virtual environment
Data integration using VARest and Node-Red
Ready-made control panel
Includes technical documentation for help with setting up Node-Red
Technical details
Includes Node-Red json file (DataIntegration.json)
Add new cities with latitude and longitude information
Monitors waiting to receive Media Input
Triangle count: 6,063,860
Texture resolution: 4,096 and 8,192
PixotopeDMX
This example level contains 4x4 different types of light fixtures, all mapped, working, and patched to DMX universes. Blur the line between real and virtual worlds! Read the full documentation here.
Level contents
Send and receive to any universe
4 moving head fixtures
4 static fixtures
4 moving mirror fixtures
4 strobe fixtures
Technical details
Support for DMX Art-Net and SACN
Texture resolution: 4,096
