1.5 | Starting Director
Logging in
Double-click the "Pixotope Director" icon on your desktop
- Log in with your user account
- Read and agree to the license terms and conditions
For accessing offline machines, check out 1.5 | Getting a license for an offline machine (air-gapped)

Choosing a license
Choose from your available licenses.
- If the list of licenses is empty, contact your account admin to assign licenses to your user account
- If the license appears but shows "0" available, this means that you are logged in on another machine. You can release the license by logging into login.pixotope.com → Machines. This will log you out on the other machine
Check out which license type fits your needs: 1.5 | License types: Live, Artist or Remote.
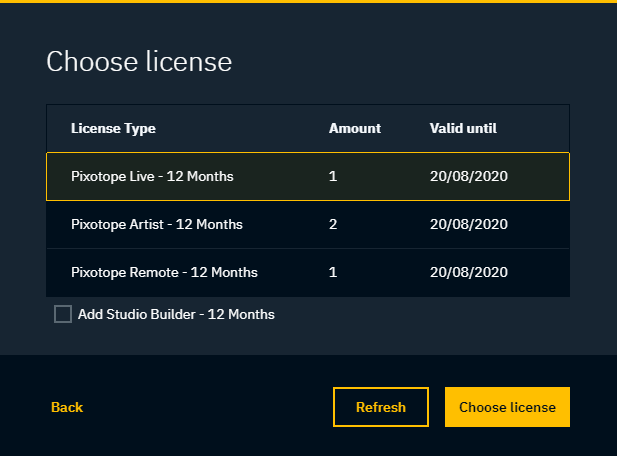
You can change the license type later in the 2083981290.
When an Artist license is chosen, the startup check is skipped.
Startup check
Let the startup check guide you through the machine setup.
Network
Select which network adapter should be used for communication between Pixotope machines.
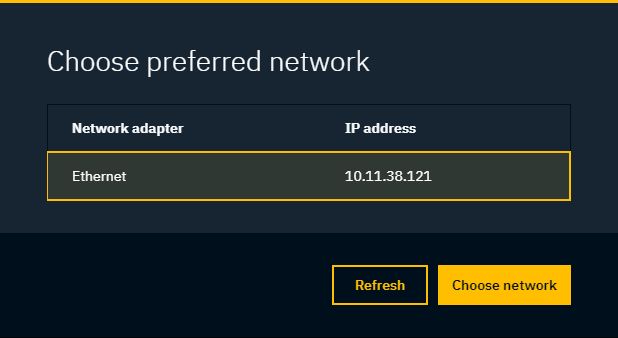
Tracking data can be sent via another network adapter as long as they are both on the same subnet.
Data hub
The Data hub connects and handles all communication between the Pixotope machines of a virtual production. Each production needs just one Data hub.
Learn more about 1.5 | Single- and multi-machine setups.
Choose whether you want to:
- Start your own Data hub
- Other machines will be able to connect to your Data hub
- Connect to another Data hub
- Select from the list of discovered Data hubs
You can change this later under SETUP → General → Network.
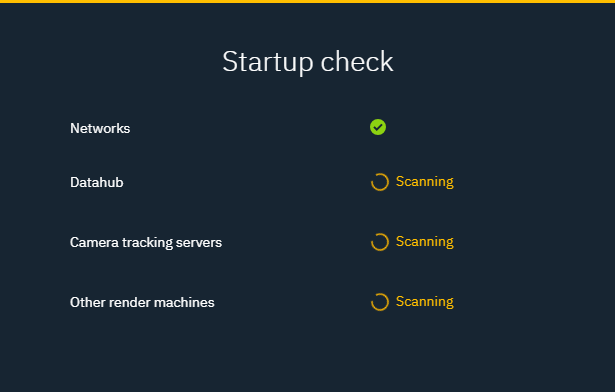

Other render machines
Director scans for other render machines connected to the chosen Data hub.
Director start page
Main menu
Pixotope Director provides a main menu on the left-hand side with two different views. Select the view depending on which production step you are in.
- SETUP - shows all the steps for configuring and calibrating your machine and studio setup
- The default for Live and Remote license
- PRODUCTION - shows all the steps for adjusting and controlling your running levels
- The default for Artist license
Check out the 2 different views in Director: 1.5 | Adjusting levels from Director.
Launch page

The Launch page is accessible from both modes. It shows all Pixotope and Unreal projects found in the projects folder search paths (Settings → General) and displays the levels and control panels in them.
Here you can:
- choose which project to work on
- set as "Current project"
- create new projects
- launch levels
- launch LIVE
- launch in Editor
- switch to other levels
- open control panels
Learn more about the different ways to launch a level: Running levels in the Editor/Engine.
Use the "Rescan folders" button in case changes in your projects folder are not reflected here automatically.
Status bar
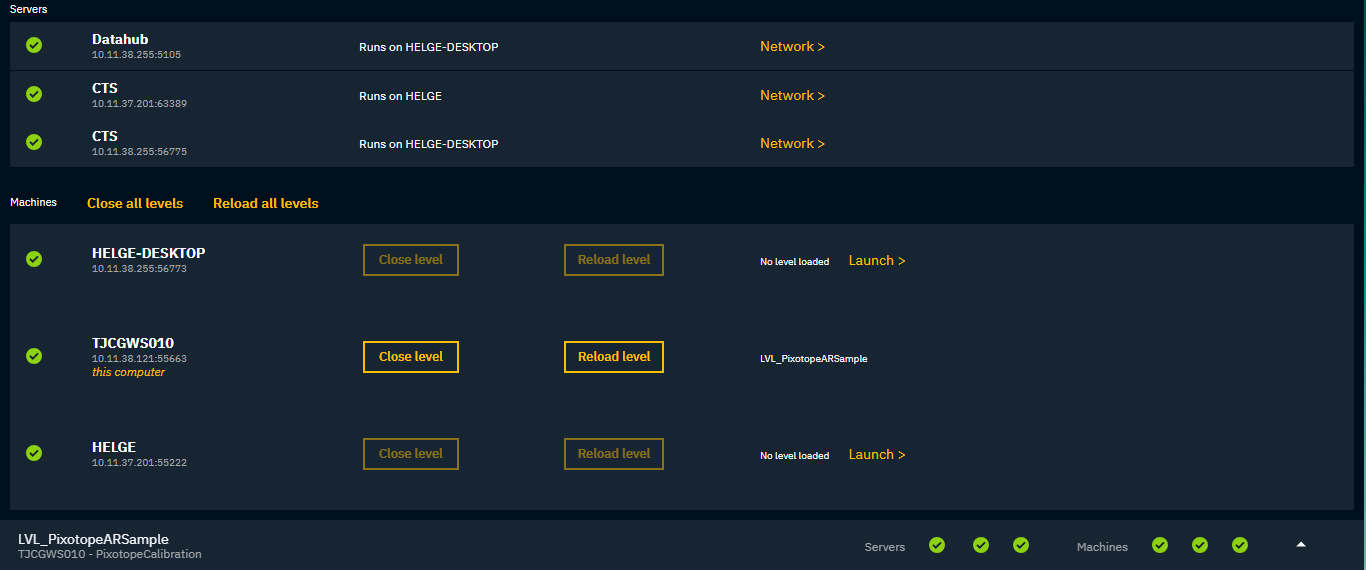
The Status bar at the bottom provides an overview of:
- all servers in the same Data hub network
- all machines in the same Data hub network
- levels running
Click the Status bar to expand it. This displays more details, and allows you to:
- reload levels
- close levels
User menu
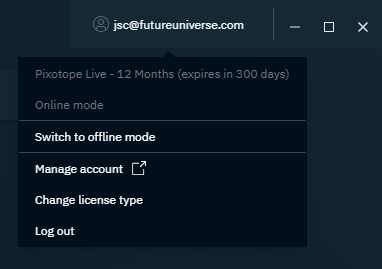
The user menu can be accessed by clicking the username in the upper right-hand corner. It provides:
- license information:
- license type - more information
- expiry date
- Online/Offline mode - more information
- duration
- license type - more information
- the ability to switch between Online and Offline mode
- the ability to switch between license types
- access to your user account on Pixotope Cloud
- the option to log out
Windows menu
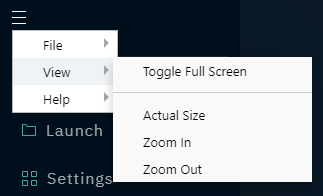
The Windows menu in the upper left-hand corner provides access to:
- view options
- Privacy Policy
- End-User license agreement (EULA)
- Subscription agreement
- About Director
Setting up your machine
Continue to 1.5 | Setting up a Pixotope machine.